My Close-up Photography Gear
Contents
Introduction
Over the years, I have used several lenses and accessories for photographing bees and other small subjects. I did not set out to build a large collection. Most of this gear was acquired gradually as I experimented with different techniques or replaced equipment that no longer worked.
My main camera is a Nikon D7200. Its APS-C sensor gives me a relatively tight field of view, which is useful when photographing small bees, while still producing files with enough detail for some cropping when needed.
Close-up Lenses
My first dedicated close-up lens was the Tamron SP 90mm f/2.8 Macro. It was a good introduction to close-up photography and served me well until it eventually broke.
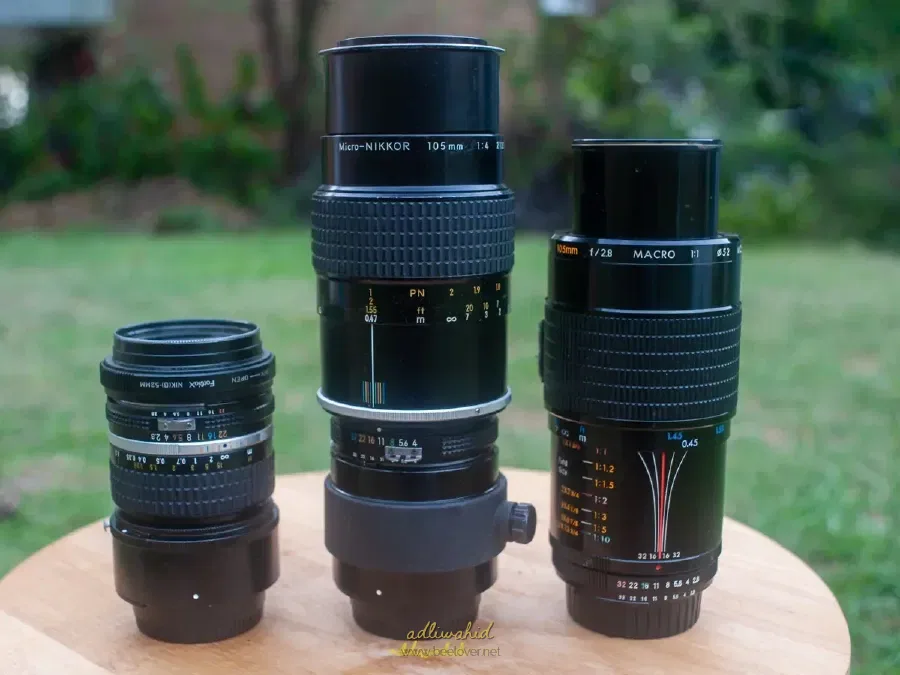
I replaced it with an AI Micro-Nikkor 105mm f/4. It was inexpensive, especially compared with newer lenses, but turned out to be excellent. It reaches 1:2 magnification on its own, so an extension tube is needed to reach 1:1. I still find it useful when I want more space around the subject rather than having the bee fill the frame.
I later bought the Lester A. Dine 105mm f/2.8, sometimes known as the “dentist lens”, followed by the Panagor PMC Auto Macro 90mm f/2.8. Both are vintage manual-focus lenses that can reach 1:1 magnification without an additional extension tube. This keeps the setup relatively simple and easy to handle.
My latest lens is the Laowa 100mm f/2.8 2× Ultra Macro APO in Nikon F mount. It focuses from infinity down to 2:1 magnification, allowing it to record a subject at twice its actual size on the camera sensor. This is particularly useful for very small bees, including Lasioglossum (Homalictus) species.
The Laowa is manual focus, but that suits the way I work. At higher magnifications, I usually set the reproduction ratio first and move slightly forwards or backwards until the important part of the bee comes into focus.
Reversed Lenses
Before getting the Laowa, I experimented with reversing a Nikkor 28mm AI-S lens. A reversing ring allows the lens to be mounted backwards on the camera, while an extension tube such as the Nikon PK-13 can be added for even greater magnification.
This setup can produce very detailed photographs, and I have taken some images with it that I am pleased with. However, it is quite technical and difficult to use outdoors.
The working distance is very short, the depth of field is extremely shallow, and the viewfinder becomes dark when the lens is stopped down. Finding and focusing on an active bee can therefore be frustrating.
I find this technique more practical indoors, under controlled lighting, or when photographing static and slow-moving subjects. It is an affordable way to experiment with high magnification, but it requires plenty of patience.
Extension Tubes, Teleconverters and Close-up Attachments
I sometimes use extension tubes when I want a little more magnification. An extension tube fits between the camera and lens, allowing the lens to focus more closely. It contains no glass, so it does not add another optical element to the setup.
The main trade-off is that the working distance becomes shorter. This may not matter with a static subject, but it can make photographing an active bee more difficult because the front of the lens needs to move closer.
Another option I use is the Nikon TC-14A 1.4× teleconverter. It increases the effective focal length and reproduction ratio of a compatible lens by 1.4 times.
For example, a lens that reaches 1:1 can produce approximately 1.4:1 magnification with a 1.4× teleconverter. One advantage is that it increases magnification without significantly reducing the focusing distance, which can be helpful when photographing bees that are easily disturbed.
The teleconverter adds some weight and may slightly reduce image quality, but I have found the TC-14A useful with compatible manual-focus lenses.
I also sometimes use the Raynox DCR-250, an 8-dioptre close-up conversion lens that clips onto the front of a compatible lens. It is lightweight and very easy to attach or remove.
However, being easy to attach does not mean it is easy to use. The Raynox produces a narrow focusing range and can bring the working distance quite close, particularly when paired with a longer lens. The depth of field also becomes extremely shallow.
Finding the subject in the viewfinder and keeping a moving bee in focus can therefore be surprisingly tricky. It takes practice and patience, but the Raynox remains a convenient and affordable way to experiment with higher magnification.
The amount of magnification it provides depends on the focal length and focusing position of the main lens, so it does not have one fixed reproduction ratio.
Flash and Diffuser
For most of my close-up bee photographs, I use a Meike MK-320 speedlight mounted on the camera’s hot shoe.
Flash is useful not only for adding light but also for freezing movement. At lower power settings, the flash duration is very short, which helps when photographing active bees.
I normally begin at around 1/16 power and adjust it as needed. The exact setting depends on the magnification, working distance, available light and subject.
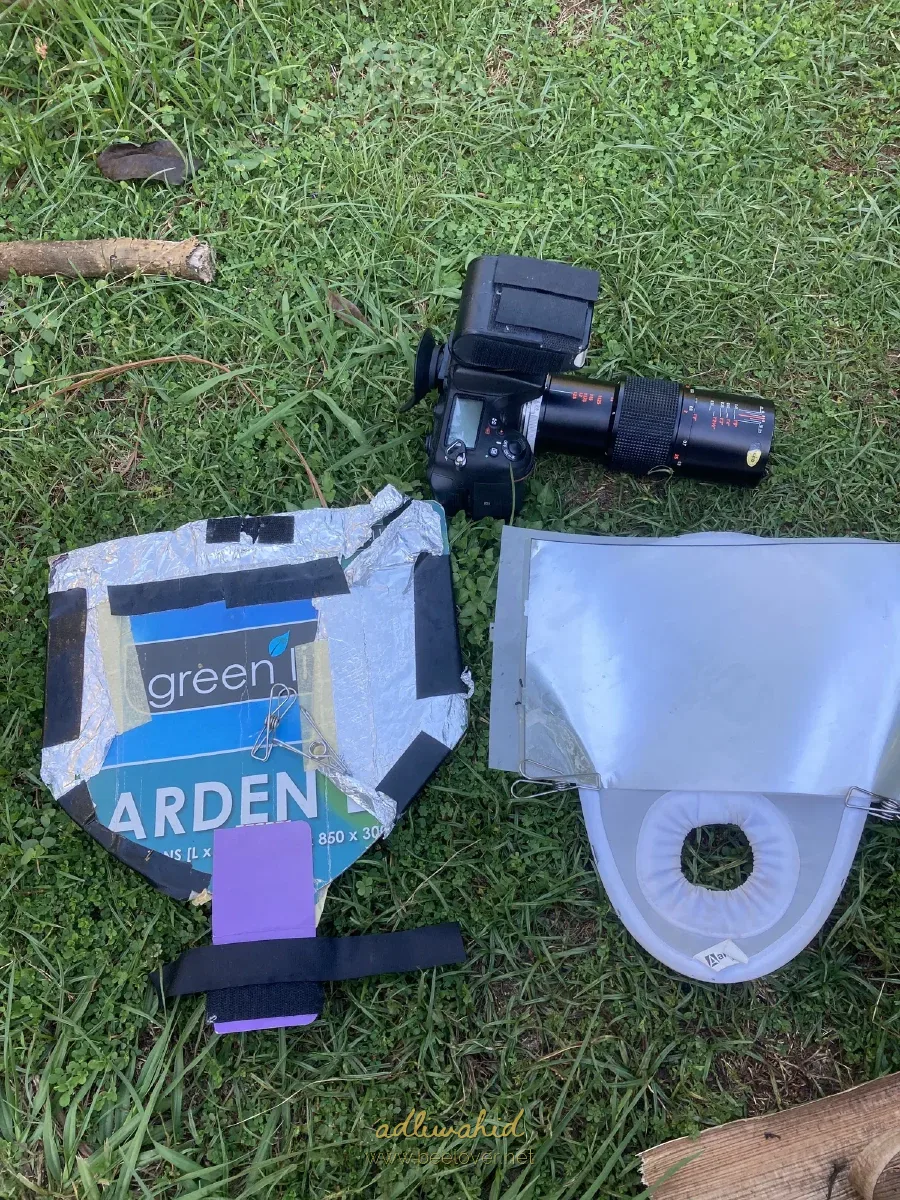
I also use a homemade diffuser. Its purpose is to make the light source appear larger and bring it closer to the subject. This helps soften the light and reduce harsh reflections on the bee’s eyes and body.
My latest diffuser build was inspired by an iNaturalist discussion on flash diffusion materials. The design uses several diffusion layers, including recycled sheets from an LCD screen, to spread the light more evenly. I adapted the idea to suit my own camera, lens and flash setup.
There is no single perfect diffuser design. I have found that its size, shape and position are usually more important than the material alone. A little experimentation is needed to find a design that works well with your equipment and the subjects you photograph.
Camera Settings
My usual starting point is manual exposure mode, an aperture of f/11 and a shutter speed close to the camera’s normal flash-sync speed.
These days, I normally use Auto ISO. The Nikon D7200 handles higher ISO settings reasonably well, and Auto ISO allows the camera to respond as I move between bright flowers, shaded areas and different backgrounds.
I usually set the white balance manually to 4200K, which works well with my flash and diffuser setup most of the time.
I photograph in RAW format, so I can still adjust the exposure, white balance, highlights, shadows and noise later in Lightroom.
I tend to keep the aperture at f/11 because depth of field is already very shallow at close range. When the setup needs more light, I normally adjust the flash power and let Auto ISO deal with smaller changes rather than opening the aperture.
These settings are only a starting point. I usually take a few test photographs and make small adjustments according to the subject, background and lighting.
A Note About Gear
You do not need several lenses or an elaborate setup to photograph bees.
It is easy to develop GAS—gear acquisition syndrome—and start believing that another lens or accessory will solve every problem. I have certainly enjoyed experimenting with different equipment, but better gear does not replace observation, patience and practice.
A single close-up lens, a basic flash and a workable diffuser are enough to get started. The most useful thing you can do is spend more time outside, take more photographs and learn how the bees behave.
The lens is only a tool. The photographs come from what you notice and how you choose to use it.