Notes on Close-up Bee Photography
Contents
Introduction
As a nature lover, I enjoy spending time in the garden and observing the small creatures that live there. Bees are among my favourite subjects. They are important pollinators, but they are also fascinating to watch and photograph.
Close-up photography has encouraged me to slow down and notice details that I might otherwise miss. Over the years, I have experimented with different lenses, lighting setups and techniques. I am still learning, but these are some of the things that have worked for me.
You can see examples of my bee photographs, including some of the behaviours described in this article, in the gallery section of this website.
Get to Know the Bees
Before taking photographs, I find it helpful to spend some time watching the bees and learning about their behaviour.
Blue-banded bees, leafcutter bees and teddy bear bees are among the native solitary bees you may encounter in Australia. There are also much smaller bees, including species from the Lasioglossum (Homalictus) group, which can be particularly challenging to photograph.
Different bees have different habits. Some move quickly between flowers, while others spend longer collecting pollen or nectar. Some return regularly to the same patch of flowers, nesting site or resting place.
After observing them for a while, you may begin to anticipate where a bee is likely to land or which flowers it prefers. This can make photographing them a little easier.
Planting a variety of flowering plants can also encourage more bees to visit the garden. Different species have different preferences, so I try to observe which plants attract the bees already living in my area.
Choosing a Lens
A dedicated close-up lens is one of the easiest ways to photograph bees at higher magnifications. Over the years, I have used and collected several lenses, although this happened gradually rather than as part of a carefully planned collection.
My first close-up lens was the Tamron SP 90mm f/2.8 Macro. It served me well until it eventually broke. I then bought an AI Micro-Nikkor 105mm f/4, which was inexpensive but turned out to be an excellent lens.
After that came the Lester A. Dine 105mm f/2.8, sometimes known as the “dentist lens”, followed by the Panagor PMC Auto Macro 90mm f/2.8. Both can reach 1:1 magnification without an additional extension tube, which keeps the setup relatively simple and easy to handle.
The Micro-Nikkor 105mm f/4 reaches 1:2 on its own, so it needs additional extension to reach 1:1. Even so, it remains a very capable lens, particularly when I do not need the bee to fill the frame.
More recently, I started using the Laowa 100mm f/2.8 2× Ultra Macro APO in Nikon F mount. It can focus from infinity down to 2:1 magnification, giving me more magnification than a standard 1:1 lens without needing a reversed-lens setup. It is manual focus, but that suits the way I normally photograph bees.
The 100mm focal length also gives me a practical working distance compared with shorter high-magnification lenses. When I need a little more magnification, I can add an extension tube, although this reduces both the working distance and the amount of light reaching the sensor.
When I need a little more magnification, I can add an extension tube. However, this also reduces the working distance and the amount of light reaching the sensor.
Most of these lenses are manual focus, which suits the way I photograph bees. Vintage manual-focus lenses often have long, smooth focusing movements and can also be cheaper than modern alternatives.
That said, you certainly do not need a collection of lenses to get started. It is easy to fall into GAS—gear acquisition syndrome—and assume that buying another lens will automatically improve your photographs.
The lens is only a tool. In my experience, spending more time observing bees, practising and taking photographs makes a much bigger difference.
Understanding Magnification and Framing
A reproduction ratio of 1:1 means that the image projected onto the camera sensor is the same physical size as the subject.
For example, a bee measuring 10mm in length will produce an image approximately 10mm long on the sensor at 1:1 magnification.
At 2:1, the image of that same bee will be approximately 20mm long on the sensor. This can be useful for very small subjects, including Lasioglossum (Homalictus) bees, or when I want to show fine details such as eyes, hairs, wings or pollen-covered legs.
Sensor size affects how tightly the bee appears within the frame, but it does not change the actual reproduction ratio. A lens set to 1:1 still records the subject at life size on the sensor, whether it is used on a full-frame or crop-sensor camera.
Higher magnification is not always better. I do not always want the bee to fill the frame. Sometimes the flower, plant or surrounding environment is an important part of the photograph.
This is especially true when photographing bees roosting together. Including several bees, the stem they are holding onto and some of the surrounding space can tell a more interesting story than a tightly framed photograph of one bee.
The most suitable magnification depends on the subject and the kind of photograph I am trying to make.
Going Beyond 1:1
Before buying the Laowa, I experimented with reversing a Nikkor 28mm AI-S lens. A wide-angle lens mounted backwards can produce magnification beyond 1:1.
A reversing ring connects the lens to the camera using its filter thread. An extension tube, such as the Nikon PK-13, can then be placed between the camera and the reversed lens to increase the magnification further.
This technique can produce excellent results, and I have taken some photographs with it that I am very happy with. However, it is quite technical and can be difficult to use in the field.
The working distance is small and getting the lighting correct can be tricky. The subject can also appear very dark in the viewfinder when the lens is stopped down, making it difficult to judge focus.
For these reasons, I think a reversed-lens setup is more practical indoors, under controlled lighting, or when photographing a static or slow-moving subject.
It can still be used outdoors, but photographing an active bee with this technique requires twice the patience—or perhaps even more.
The Laowa is now my more practical option when I want to go beyond 1:1. It allows me to reach high magnification without having to assemble a reversed-lens setup, while still giving me a reasonable working distance and a more conventional shooting experience.
Another option I sometimes use is the Raynox DCR-250, an 8-dioptre close-up conversion lens that attaches to the front of a compatible lens. It is lightweight, convenient and easy to remove.
The amount of magnification depends on the focal length and focusing position of the main lens, so it does not provide one fixed reproduction ratio.
Using Manual Focus
Autofocus can struggle when a small bee is moving among flowers and leaves, particularly when the depth of field is only a few millimetres—or even less.
For this reason, I normally use manual focus.
Instead of constantly turning the focusing ring, I set the lens to roughly the magnification I want and then move my upper body slowly forwards or backwards. When the bee’s eyes or another important feature comes into focus, I press the shutter.
This technique works well with vintage manual-focus lenses such as the Lester A. Dine, Panagor and Micro-Nikkor. The Laowa is also manual focus, so the same approach applies.
It takes practice, especially when the bee is moving, but over time the movement becomes more natural.
Using Flash and a Diffuser
Flash is not essential for every close-up photograph, but I find it extremely useful when photographing active bees.
At low or moderate power, the brief duration of the flash can help freeze movement. It also provides enough light to use a smaller aperture, which is useful because depth of field becomes very shallow at higher magnifications.
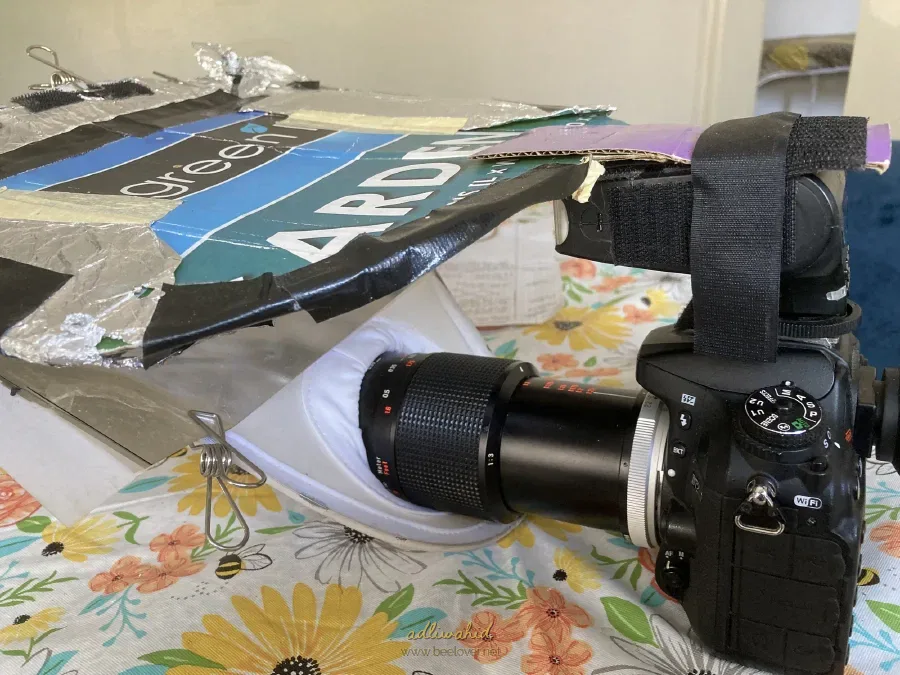
I use a Meike MK-320 speedlight mounted on the camera’s hot shoe, together with a homemade diffuser.
The diffuser makes the light source appear larger and brings it closer to the subject. This helps soften the light and reduce harsh reflections on the bee’s eyes and body.
I normally start with the flash in manual mode at around 1/16 power, then adjust it according to the distance, aperture and available light. Lower flash power generally produces a shorter flash duration, which can help freeze movement.
The diffuser should sit close to the subject without touching the flowers or blocking the lens. In my experience, its size, shape and position are often more important than the material used to make it.
In my opinion, there is no single perfect diffuser design. A little experimentation is usually needed to find something that works well with your camera, lens and flash.
Starting Camera Settings
My usual starting point is manual exposure mode, an aperture of f/11, and a shutter speed close to the camera’s normal flash-sync speed.
These days, I normally leave the Nikon D7200 on Auto ISO. The camera handles higher ISO settings reasonably well, and Auto ISO allows it to respond quickly when I move between bright flowers, shaded areas and different backgrounds.
I usually set the white balance manually to 4200K. I find that this produces fairly consistent colours with my flash setup and works well most of the time.
Because I photograph in RAW format, I can still adjust the exposure, white balance, highlights, shadows and noise later in Lightroom.
There is always a compromise between depth of field, sharpness, ISO and flash power. I normally treat these settings as a starting point and adjust them according to the subject and conditions. In the end, it is always about the results - happy vs not happy!
Taking Test Photographs
Before concentrating on the bees, I usually take a few test photographs of a flower or another object at roughly the same distance.
This gives me a chance to check the exposure, flash position and quality of the light.
It is also worth paying attention to the background. A small movement to the left or right can completely change the colours and shapes behind the bee without disturbing it.
Focusing on the Eyes and Finding a Good Angle
When the bee’s eyes are visible, I usually try to make them the sharpest part of the photograph. There’s something about this that makes the image more presentable. Of course, the eyes of the bees can be quite fascinating as well.
At close range, there may not be enough depth of field to keep the entire bee sharp. I try to position the camera so that the eyes and as much of the body as possible sit within the same plane of focus.
After photographing bees for a while, I also began to notice that some angles are more pleasing than others. I call this the “B-Side”.
Specifically this I prefer photographing bees from the side. This angle often shows the shape of the body, eyes, wings and legs clearly, while also giving a better view of what the bee is doing.
A side view can work especially well when a bee is collecting nectar or buzz-pollinating a flower. It shows the bee clearly while also capturing its interaction with the plant.
Of course, there is no single correct angle. A front-facing photograph can emphasise the eyes, while a view from behind might show pollen on the legs or an interesting wing position.
Photographing Different Behaviours
Bees behave differently depending on the species, weather, time of day and what they are doing. You may see them collecting nectar or pollen, buzz-pollinating flowers, building nests, defending territory or roosting overnight.
Some of my favourite photographs have come from simply watching these activities unfold. On one occasion, I saw a leaf-cutter bee cutting a piece from a leaf on my Vietnamese mint. It then carried the leaf back to a nearby bee hotel to use in its nest. Being able to observe and photograph the different stages made the experience especially memorable.
Another interesting behaviour to look out for is nectar concentrating, sometimes described by bee photographers as “bubbling”. The bee brings a droplet of nectar to its mouthparts and repeatedly exposes and reabsorbs it. It is a fascinating moment to observe, and I have been fortunate enough to photograph it a few times.
These behaviours can produce more interesting photographs than simply recording a bee sitting on a flower. They also help tell a fuller story about how bees feed, nest and interact with their surroundings.
A resting or roosting bee may allow more careful focusing and a wider composition. A fast-moving bee visiting flowers may be easier to photograph with flash and a tighter frame.
The more time I spend observing bees, the more familiar their small patterns of behaviour become.
Being Patient and Spending Time Outside
For every photograph that works, there may be hundreds that are blurred, badly framed or focused on the wrong part of the bee. That is simply part of the process.
Photographing bees takes patience, but I try not to treat it as a race to produce perfect images. Sometimes it is enough to sit in the garden, watch what is happening and enjoy the experience.
Spending time outside also gives you a better chance of seeing behaviours that are easy to miss. A leafcutter bee may suddenly begin cutting a leaf, or a bee may pause to concentrate nectar. These moments do not always last long, and you are unlikely to photograph them unless you are already there and paying attention.
Staying in one area for a while can help too. The bees may become less concerned by your presence, and you may begin to recognise the routes they take between flowers or back to their nests.
Photographing bees has helped me appreciate how much life exists in an ordinary backyard. With a little patience, some basic equipment and plenty of practice, close-up photography can reveal a colourful and fascinating world that is easy to overlook.
You can see some of these behaviours, along with a fair amount of experimentation, in the gallery section of this website.