When I started doing close-up photography, I didn’t want to spend a lot of money to buy the latest & greatest in the market. Basically, I wasn’t even sure if I was going to do this for long. The good thing was that I didn’t have to start from scratch since I already own a camera.
TL; DR – Current Set Up
- Camera: Nikon D7200
- Lens 1: Lester A Dine 105mm f/2.8 (Manual Focus) for 1:1 magnification
- Lens 2: Nikkor 28mm ais + Reversing ring for 2 to 3 times magnification
- Lens 3: Panagor PMC Auto 90mm f/2.8 (Manual Focus) for 1:1 magnification
- Lens 4: Micro-Nikkor 105mm f/4 (Manual Focus) with extension for 1:1 magnification
- Flash: Meike MK-320
- Diffuser 1: Homemade from materials inside LCD monitor.
- Diffuser 2: Angler PSFD-100 (currently experimenting)
- Battery for flash: Panasonic Eneloop Pro (rechargeable)
- Memory Card: Sandisk 32GB or 64GB
Camera
I started with a Nikon D5200 that I purchased in 2014. It was a great dlsr camera, small, light and I liked it a lot. With this camera, I learned how to use manual mode, setup the hot shoe flash and started using manual focus lens. I think I have produced some nice photos with it. Unfortunately it stopped working so after doing a bit more research, I decided to purchase a used Nikon D7200 which is touted as more ‘advanced’. It is slightly heavier (210g more) but with some practice I was able to shoot with one hand. The two features that I liked were: the camera was weather sealed & longer battery life (compared to the D5200).
In my opinion, most modern camera (dlsr or mirrorless) are suitable for close-up photography. In fact, I have also seen folks using their camera phones with specialised lens attachment and stunning bee photos.
Lens
I started with the Tamron SP AF 90mm F/2.8 until I broke it by accident. At some point I realised that when photographing the bees I never really need to use auto focus. In fact, it is harder to use auto-focus except when the bee is static. So I started to look for an ‘older’ and somewhat cheaper manual focus macro lens.
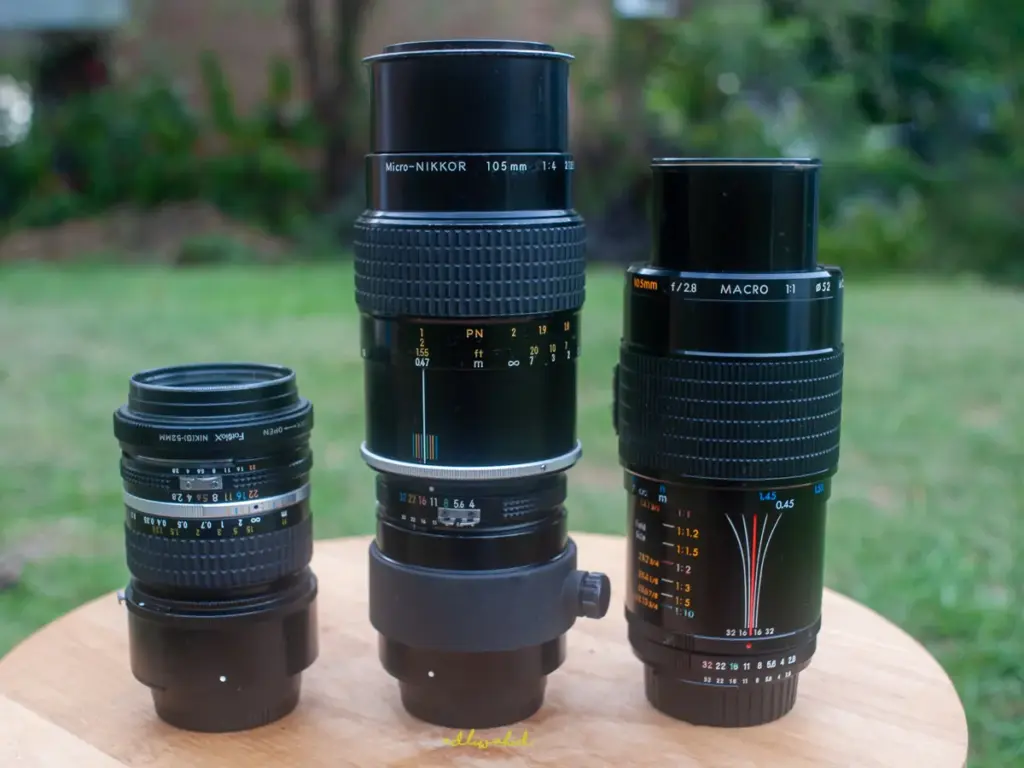
Not too long after that the Micro-Nikkor 105mm ai f/4 was my official macro lens. It is a great lens in my opinion and I was really impressed with the quality of the image it produced especially for such an old lens. The downside is that in order to get 1:1 magnification (or actual size of the bee on the sensor) I need to use a 52.5mm extension tube (PN-11). So my setup becomes a bit bulkier.
In 2022, I read about the Lester A Dine 105mm f/2.8 macro lens in a close-up photography forum and managed to find one on Ebay. It is also a manual focus lens like the Micro-Nikkor 105mm f/4 but able to do 1:1 magnification without adding any extension. Since then the Micro-Nikkor 105mm f/4 has become my backup lens.
In 2023, I came across the Panagor PMC Auto 90mm 2/8 macro lens. Another manual focus lens that can do 1:1 maginification without the need of extensions. It is also somewhat lighter than the Lester Dine. So this particular lens stays on the D7200 most of the time.
Some of the bees like the Lasioglossum (Homalictus) sp. are really small (i.e 3mm – 5mm). To get the extra magnification, I like to use my Nikkor 28mm ais manual focus lens in ‘reverse’ with an extension tube. So with the a reversing ring, you can attach the lens backwards – i.e. the front of the lens to the camera body.
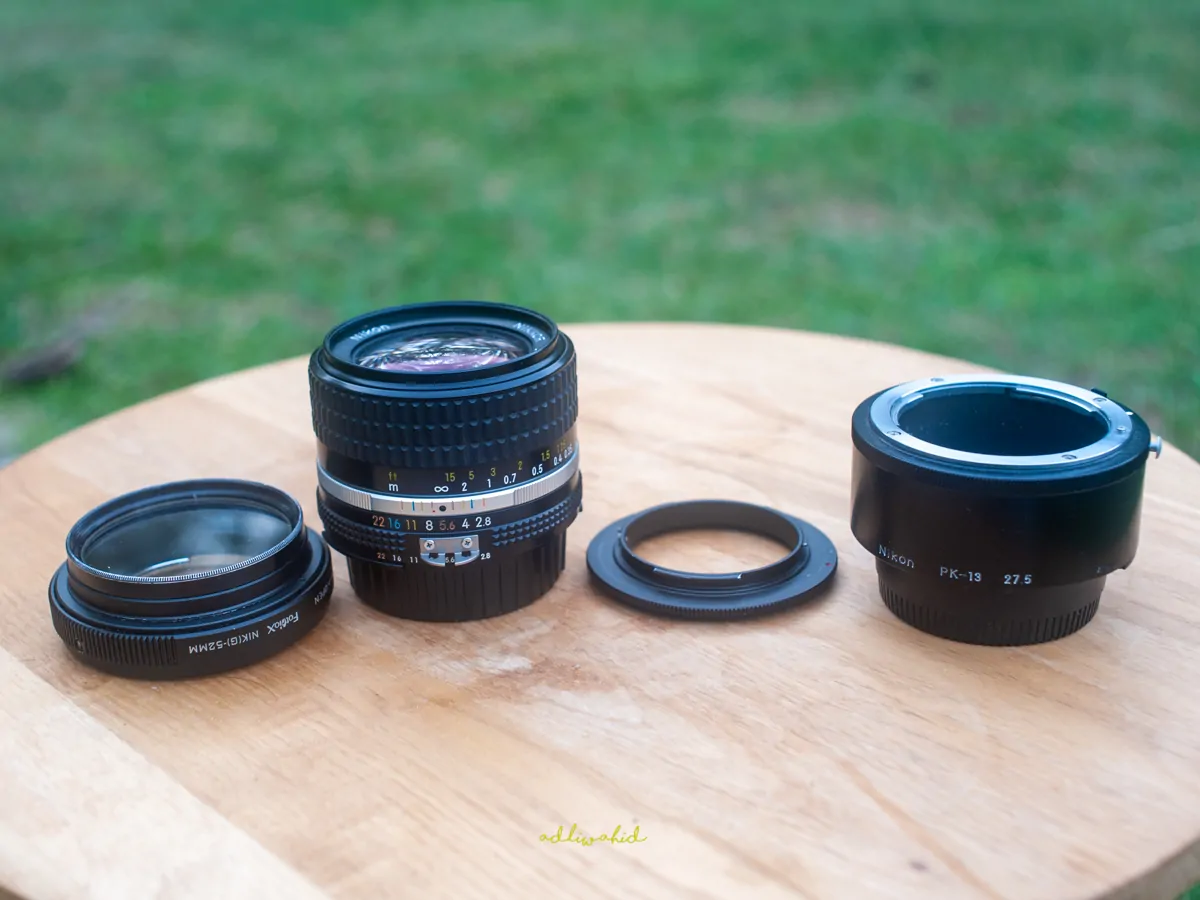
The main thing to realise about using lens that has short focal length is that the front of the lens will be very close to the subject (3-4cm). This may or may not be practical depending on the bees (i.e what they are doing) and the scene you’re trying to capture.
Flash & Diffuser
In the beginning, I only shoot with natural or available sunlight. This can work, but there are some limitations. After a while, I learned that flash is not only useful as a reliable source of light, but also can be used freeze movement. I have a few standard hot shoe flashes but I personally prefer the Meike MK-320. It is small flash which translates into a lighter setup. Furthermore, it takes only two AA batteries. Speaking of batteries, if you do a lot of flash photography then it is practical to use the rechargeable ones like Eneloop Pro.
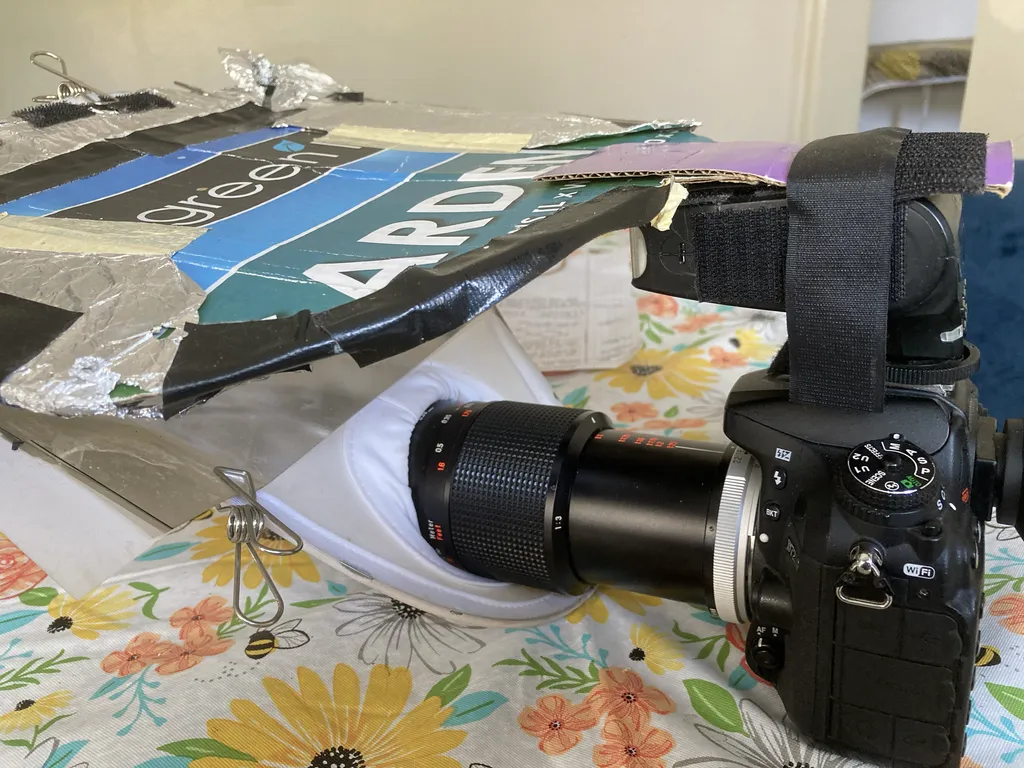
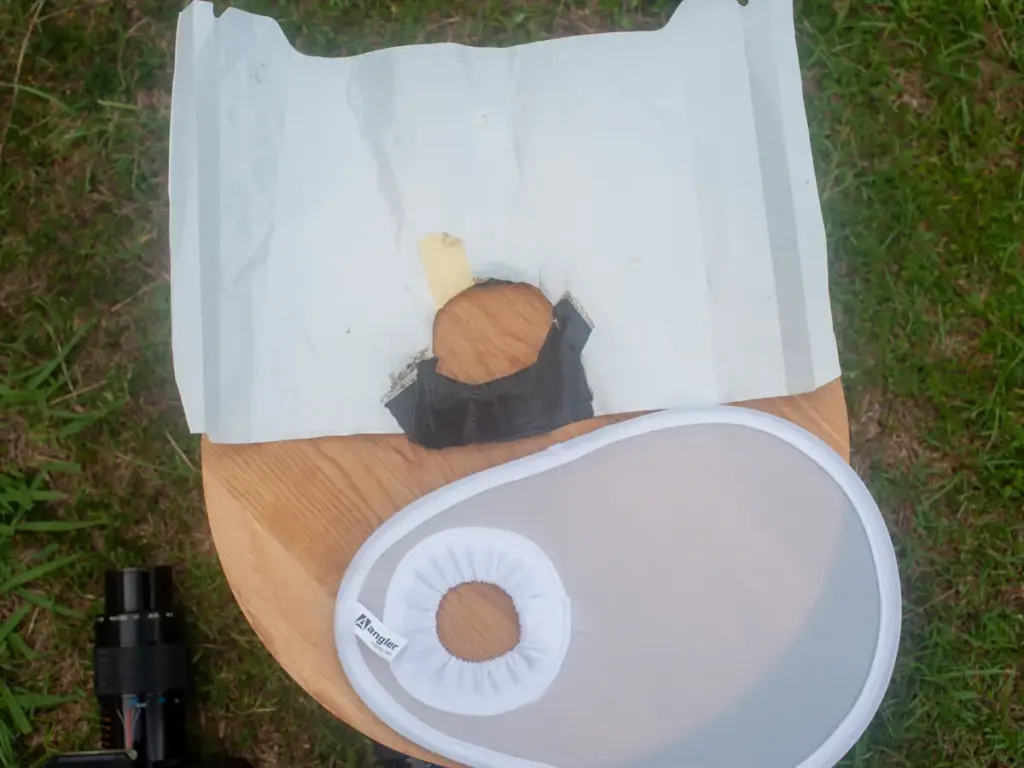
A flash diffuser is needed to spread and soften light on the subject. You can find macro photographers selling their DIY flash diffusers online. I have purchased one 2 years ago but it made my setup a bit bulky so I don’t use it as much. I ended up making my own DIY diffuser from the white plastic document holder that I purchased from OfficeWorks. It is not perfect but you I think the results are quite acceptable (see my 2022 collection)
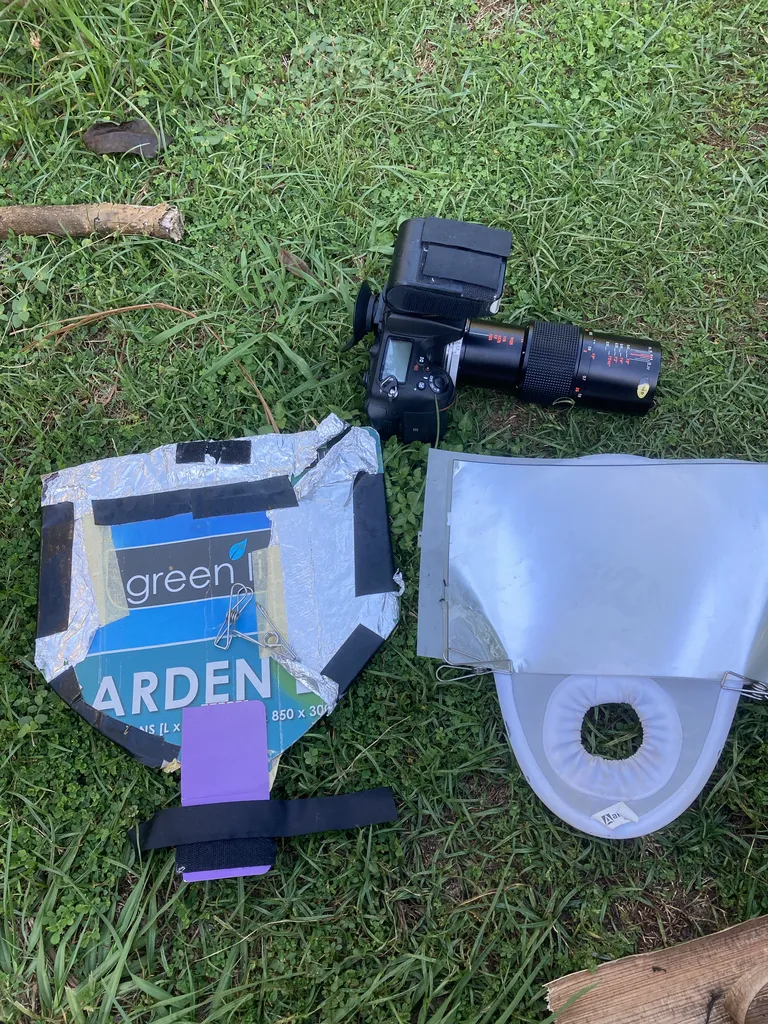
Starting in 2023, I have been experimenting with the Angler PSFD-100 portable diffuser which is very light and easy to carry. I also experimented with putting some layers of sheets found in monitors and laptops (based on this post on inaturalist). The diffusion that it produces is pretty good in my opinion.
Conclusion
So that’s a summary of my current setup for making bee photos. I plan to share a bit more in depth how I use my gears, including the ones that I haven’t mentioned in future posts.